Groups
Bundle the members of a workspace into a named group so that one sharing grant — or one spending limit — covers all of them, and keeps covering them as people join and leave.
What a Group Is For
A group is a named set of members of a single workspace. Two parts of SonicVox read it:
- Sharing. A voice, voice clone or Studio project shared with a group is reachable by every member of that group. One grant, however many people.
- Billing. A group marked as a billing group carries a credit budget that its members share for the billing cycle.
Groups live in Workspace settings, under the Groups tab (/app/settings/team). Any member of the workspace can open the tab and read the groups and their rosters. Creating, renaming and deleting a group, editing a roster, and everything to do with billing are limited to the workspace owner and admins.
Groups belong to a workspace. The tab shows the groups of the workspace you are currently switched to, and nothing from any other workspace you belong to.
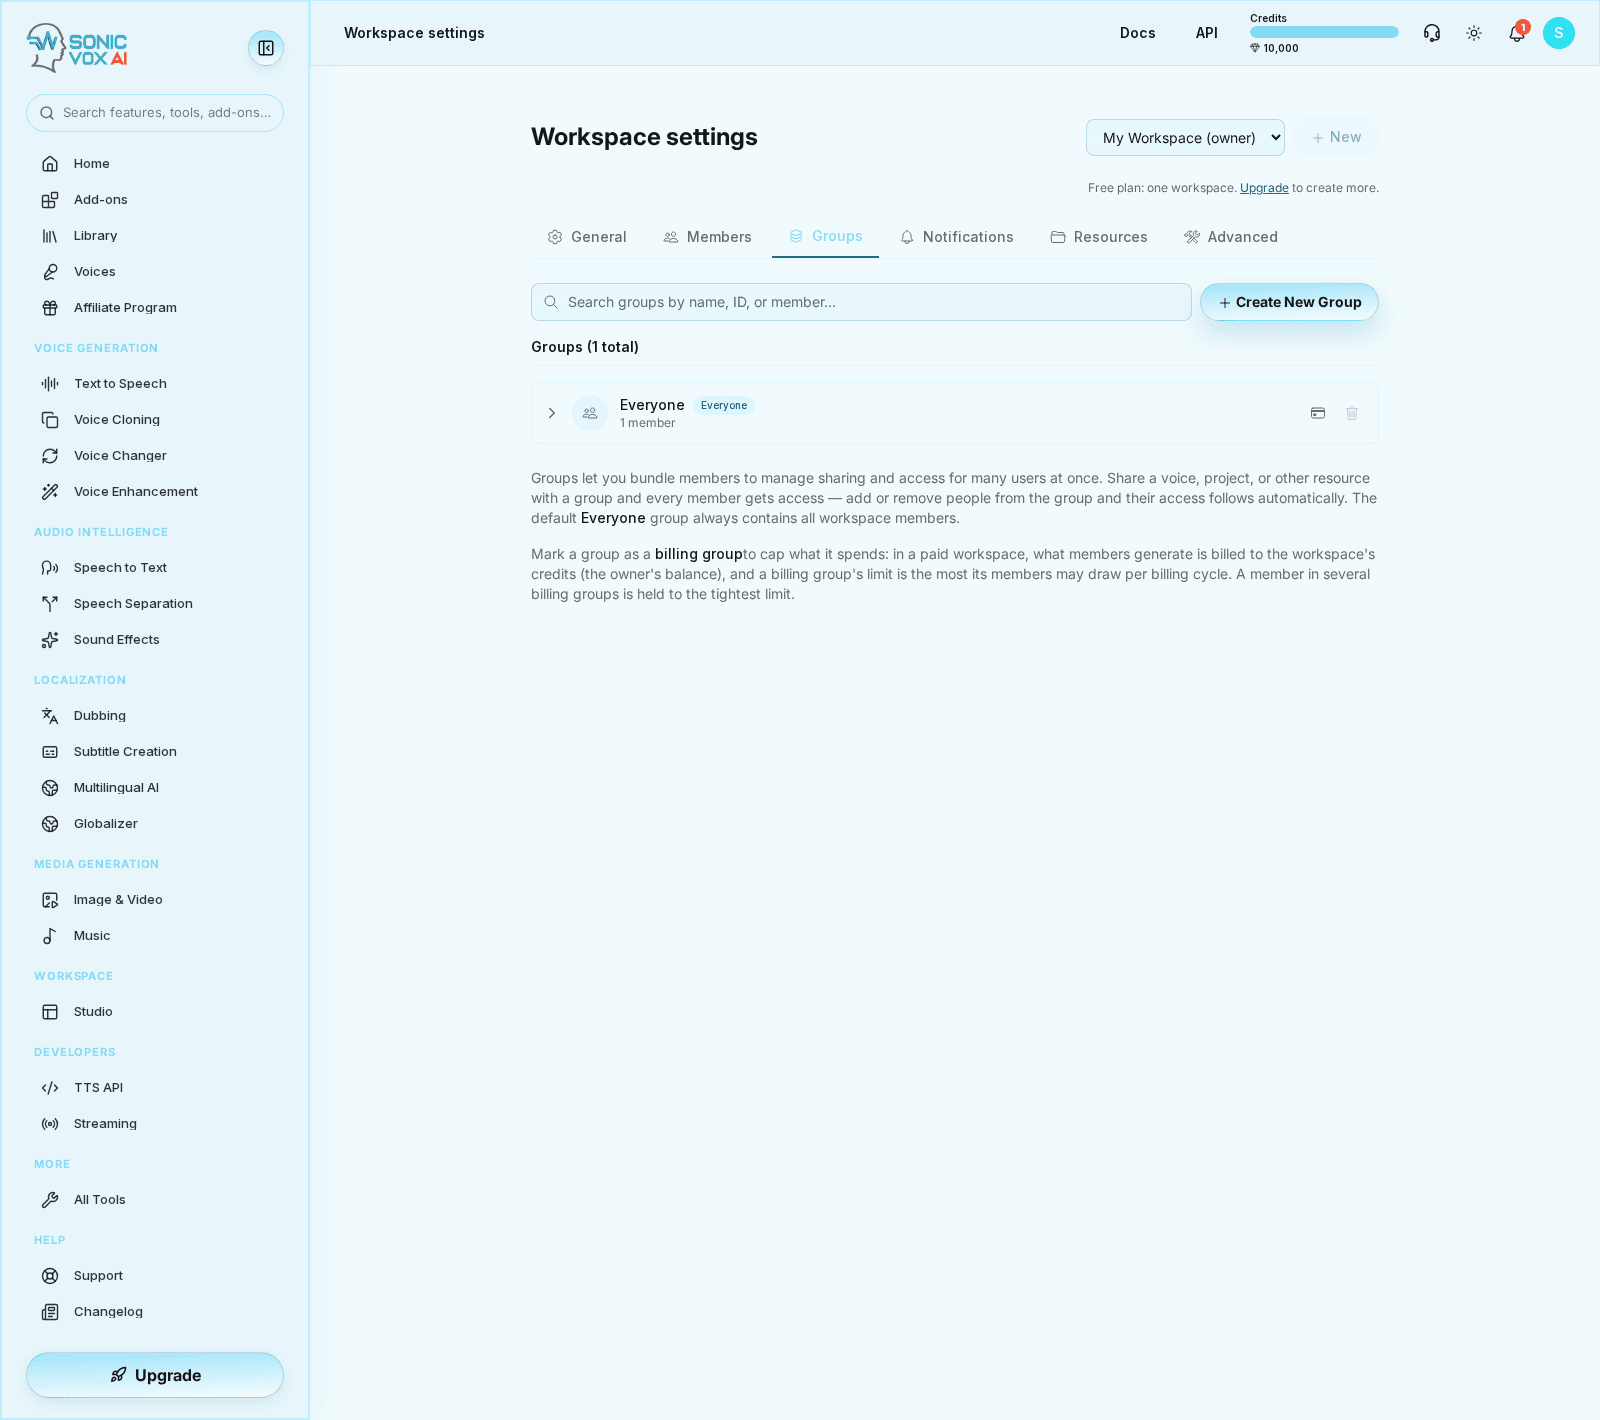
!The Groups tab in Workspace settings, showing the Everyone group

Share to a group rather than to people one at a time. A resource can be shared with at most 100 grantees, and a group counts as one of them however many members it has — so groups are what keeps a widely used voice shareable at all.
The Everyone Group
Every workspace has a group called Everyone, and it is not like the others.
Its roster is virtual. There are no membership rows behind it: when SonicVox works out what you can reach, it treats Everyone as "every live member of this workspace right now" and resolves the list on the spot. Nobody adds people to it and nobody has to remember to take people out.
That is the point. A hand-maintained "all staff" group is correct on the day it is made and wrong a month later — the person who joined last week is missing, the person who left is still in it, and a resource shared with the group is quietly reaching the wrong set of people. Because Everyone is computed rather than stored, it cannot drift.
A live member means someone who has accepted their invitation and is not suspended or deprovisioned. Pending invitees are not in Everyone; they join it the moment they accept. Suspend a member and they leave it until you reinstate them.
Consequently, Everyone:
- cannot be renamed or deleted
- cannot have people added to it or removed from it — the roster is read-only in the tab, and the server refuses the change even if the request is made directly
- cannot carry a credit limit; see below for why
Sharing to Everyone is fully supported, and it is the fastest way to make a resource available to the whole workspace. It appears in the group picker on the Resources tab like any other group.
Create a Group and Add People
You need to be the workspace owner or an admin.
- Open the Groups tab. Go to Workspace settings and choose Groups.
- Click Create New Group. Type a name and click Create. The name must be 1–60 characters and unique within the workspace;
Everyoneis reserved and will be rejected.
- Expand the group. Click its row to open it. You will see the current roster, and — for a billing group — its credit limit.
- Add people with the Add member dropdown. It lists workspace members who have accepted their invitation and are not already in the group. Someone who has been invited but has not accepted yet will not appear; add them once they accept.
- Remove someone with the cross on their row in the roster.
- Rename or delete the group with the Rename and Delete controls on its row. Deleting a group does not remove anyone from the workspace — they keep their membership, their role and their own resources.
The search box at the top of the tab matches a group's name, its ID, or the name or email of anyone in it, which is the quickest way to answer "which groups is this person in?".
Share to a Group
Sharing is done from the Resources tab of Workspace settings, keyed by the resource's ID.
- Open Workspace settings → Resources.
- Choose the resource type — Voices, Voice Clones or Studio Projects.
- Paste the resource ID into the Resource ID field.
- Switch the grantee toggle to Group and pick the group. Everyone is in this list.
- Choose a permission and click Share.
| Permission | What the group's members can do with the resource |
|---|---|
| Viewer | Use it — preview and download a shared voice, open a shared Studio project. |
| Editor | Everything a viewer can, plus change the resource itself: rename a voice or edit its use cases, labels and playback volume; record or upload into a shared Studio project. |
| Admin | Everything an editor can, plus share the resource on to other members and groups, and revoke existing grants. |
A few rules worth knowing before you share:
- You can share a resource you created, anything you hold an admin grant on, and — if you are the workspace owner or an admin — anything in the workspace. Deliberately, a viewer or editor grant does not let you pass access on, so access cannot spread one hop past the person who authorised it.
- Sharing to the same grantee again does not create a second grant; it changes the existing one's permission.
- A resource can have at most 100 grantees. A group is one grantee no matter how large it is.
- Grants are resolved against your active workspace. A resource shared with you in one workspace is visible while that workspace is the one you are switched to, not from your personal one.
Adding someone to a group afterwards gives them everything already shared with that group — you do not re-share anything.
Billing Groups and the Shared Budget
In a paid workspace, what a member generates is billed to the workspace owner's credit balance rather than their own. A billing group is how you put a ceiling on part of that spending. See the credits guide for how pooled credits work in full.
To set one up:
- Mark the group as a billing group. Use the card icon on the group's row — its tooltip reads Set as billing group. A Billing badge appears next to the group's name.
- Expand the group and set the limit. The Monthly credit limit panel appears once the group is a billing group. Click Set limit, enter a whole number of credits, and save.
- Check the row. A billing group's row states its limit, or no credit limit if none is set.
What the limit does, precisely:
- It is a shared budget, not an allowance each. The limit is measured against the total the whole group has drawn from the workspace this cycle, so one member working through it leaves less for everyone else in the group, and can exhaust it for all of them.
- The cycle is the workspace owner's billing cycle, because it is the owner's credits being spent.
- Leaving the field blank means no group limit. 0 is a real setting: it stops the group spending workspace credits until the next cycle.
- The largest limit you can set is 1,000,000,000 credits per cycle.
This is one of three ceilings, and the tightest one wins:
| Ceiling | Applies to |
|---|---|
| Basic seat cap — 50,000 credits per cycle | Anyone on a Basic seat. A Full seat has no seat cap. |
| Per-member limit | One person, set on their row in the Members tab. |
| Billing-group budget | Everyone in the group, shared between them. |
Someone in more than one billing group is held to the tightest of those budgets, and their own per-member limit or Basic-seat cap still applies on top if it is lower.
Two restrictions exist so that no control on this screen is a control that does nothing:
- Everyone cannot be a billing group with a limit. Its roster is virtual — there are no membership rows for the budget to attach to — so a limit stored against it would bind nobody while looking live. To cap a set of people, make a group with a real roster.
- Unsetting the billing flag clears the limit. Otherwise the number would sit in the background, invisible and inert, and re-arm itself the next time somebody flipped the flag back on. SonicVox asks you to confirm this, because it is a spending change: the group's members go back to being bounded only by their seat and the workspace balance.
On a Free workspace nothing is pooled — members spend their own credits — so a billing group's budget has nothing to limit there.
When Someone Leaves a Group
Access follows group membership, and it follows it immediately. There is nothing to clean up by hand.
Removed from a group. Anything that reached them only through that group stops being reachable on their next request. They keep everything else: resources they created, anything shared with them personally, anything shared with another group they are still in, and any access their workspace role gives them. On the billing side they stop counting against that group's budget, and their other ceilings continue to apply.
Removed from the workspace, or they leave. Their membership row goes, and their group memberships go with it — including their place in Everyone. Grants made to them personally are removed at the same time. Grants made to a group are untouched, because those belong to the group, not to any one member of it.
Suspended. A suspended member is treated as not a member for access purposes, so group-granted access stops for as long as the suspension lasts and returns when they are reinstated.
The group itself is deleted. Its members keep their workspace access, and anything that reached them only through that group stops. Sharing entries that pointed at the deleted group can remain listed on the Resources tab, shown as Removed group; they grant nothing, and you can revoke them there to tidy the list.
Limits at a Glance
| Rule | Value |
|---|---|
| Group name | 1–60 characters, unique within the workspace; Everyone is reserved |
| Who can manage groups | Workspace owner and admins; any member can read the tab |
| Grantees per resource | 100 — a group counts as one |
| Billing-group credit limit | A whole number, 0 to 1,000,000,000 credits per cycle; blank means no limit |
| Basic seat cap | 50,000 credits per billing cycle |